Jihye's records
[DOM] DOM 사이즈 및 좌표, 스크롤링
[DOM] DOM 사이즈 및 좌표, 스크롤링
Date: Apr 21, 2021
- API , web
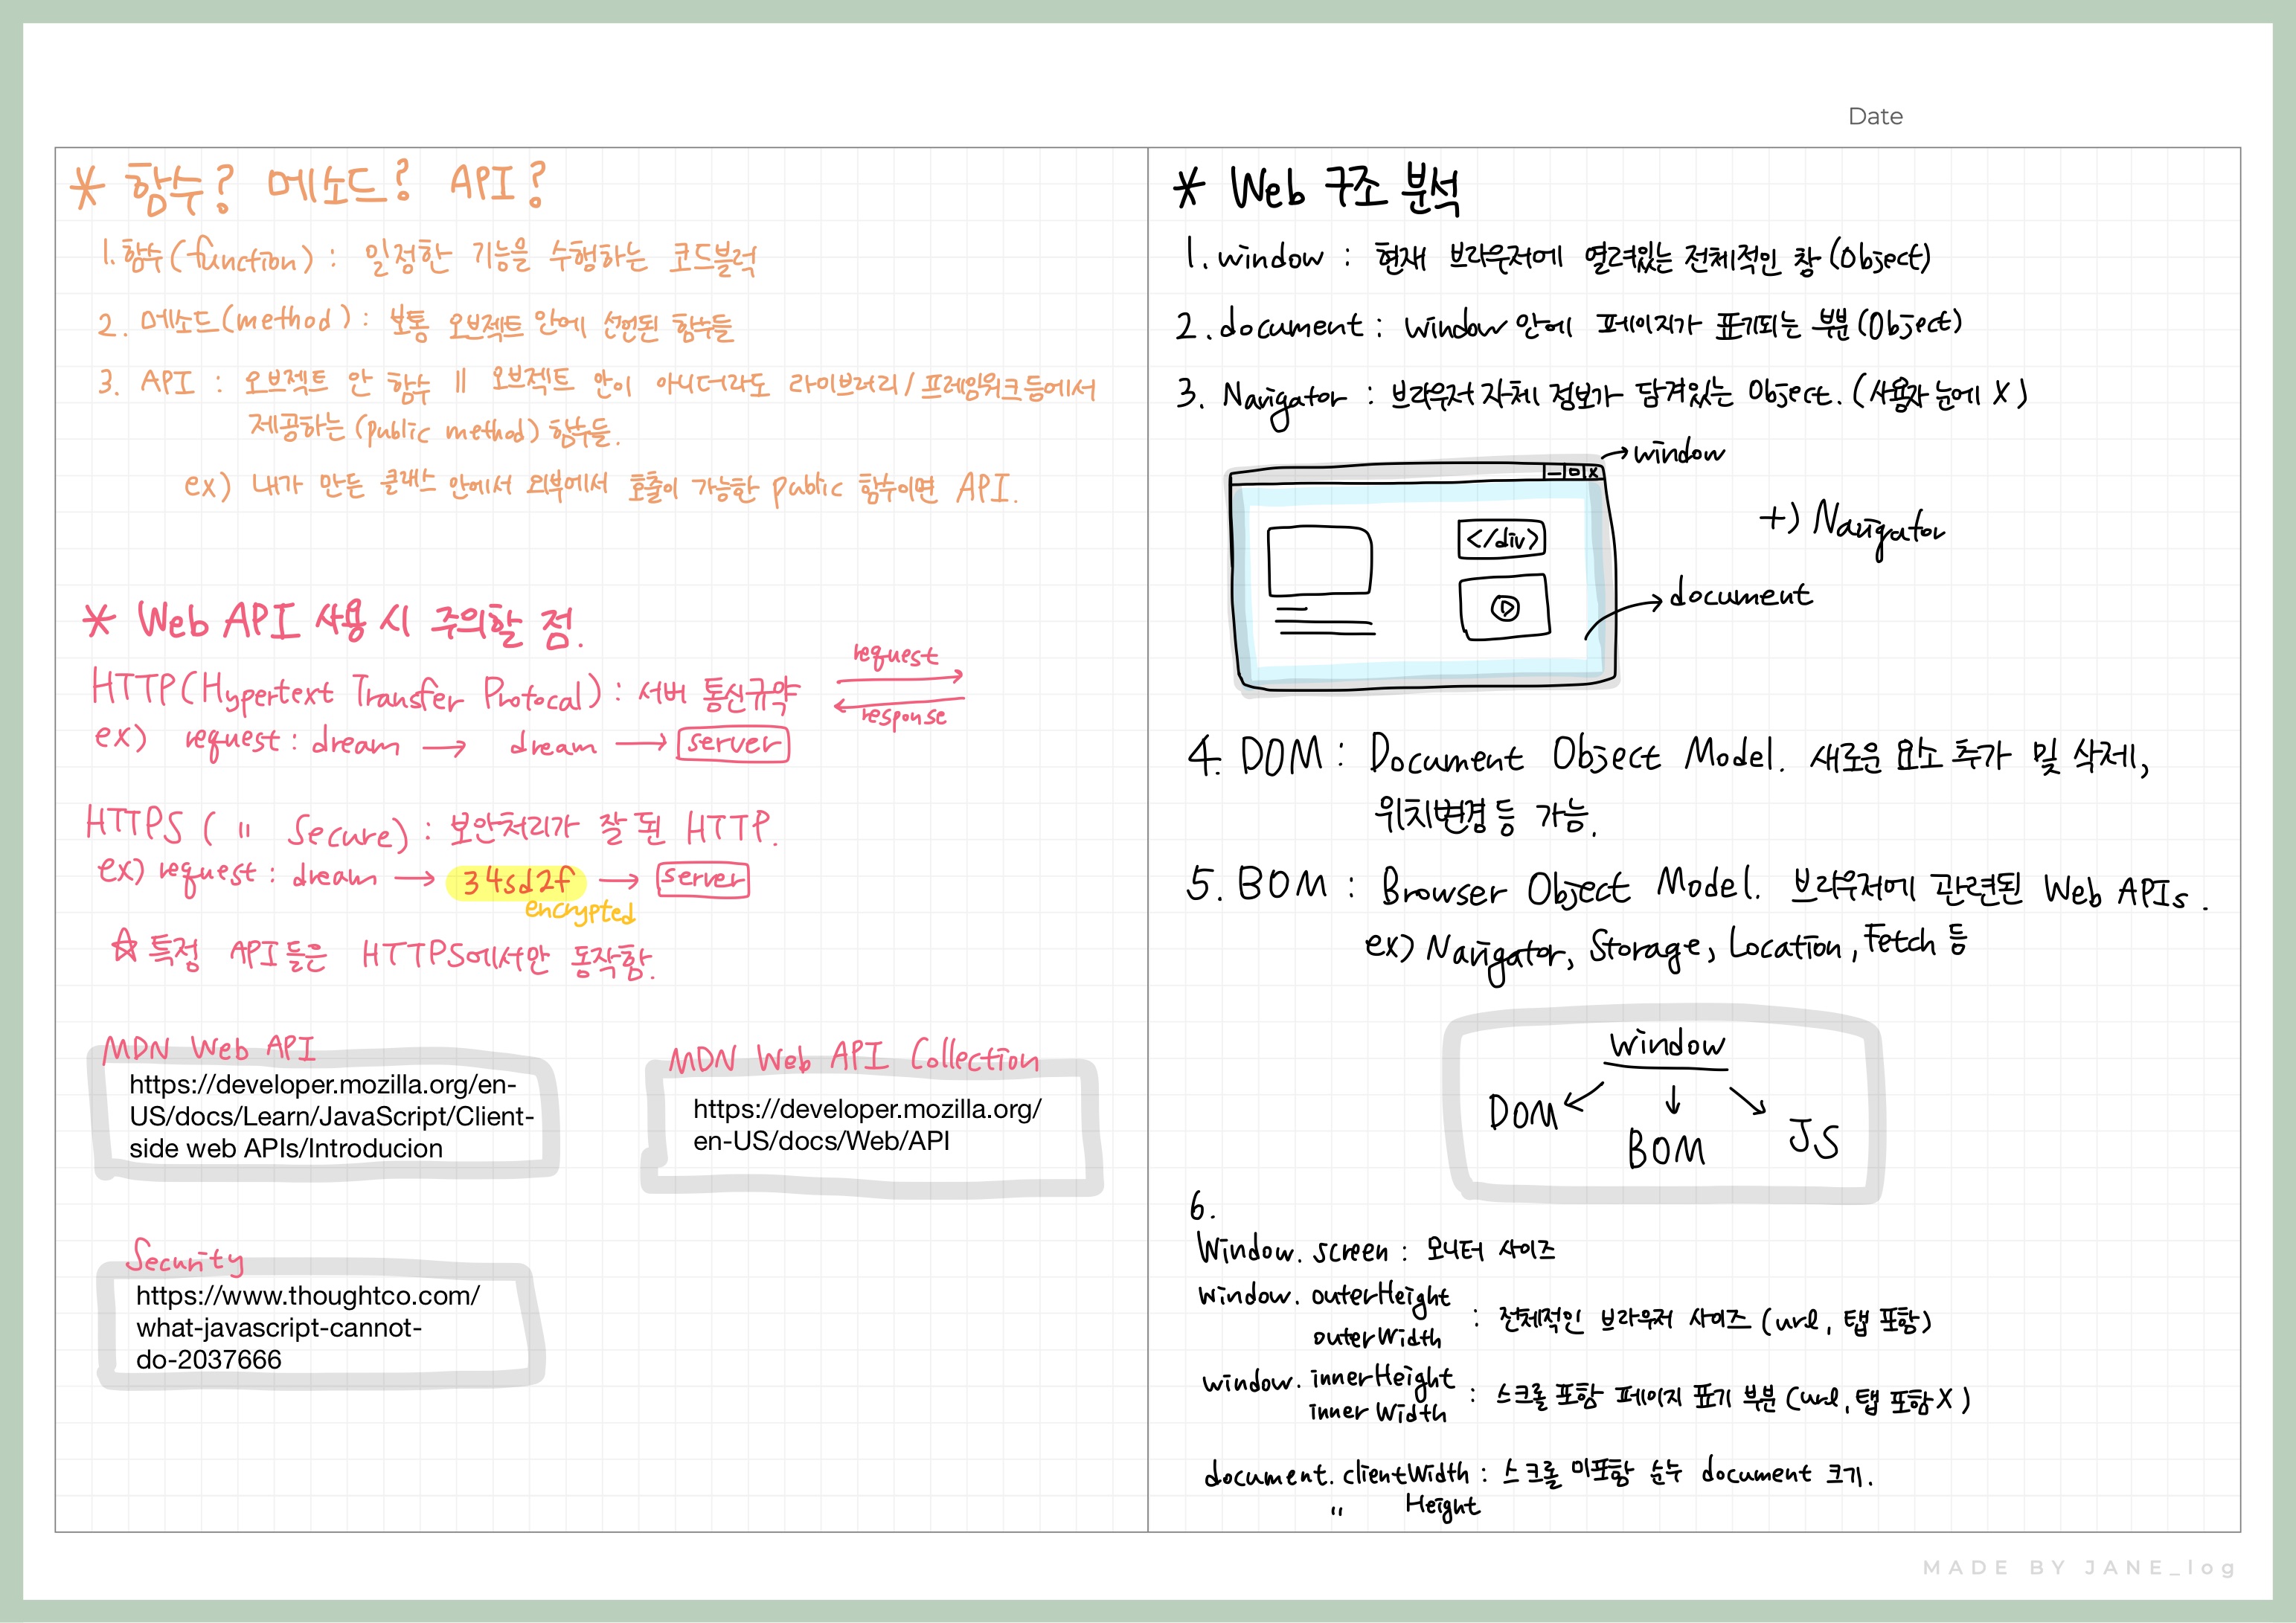
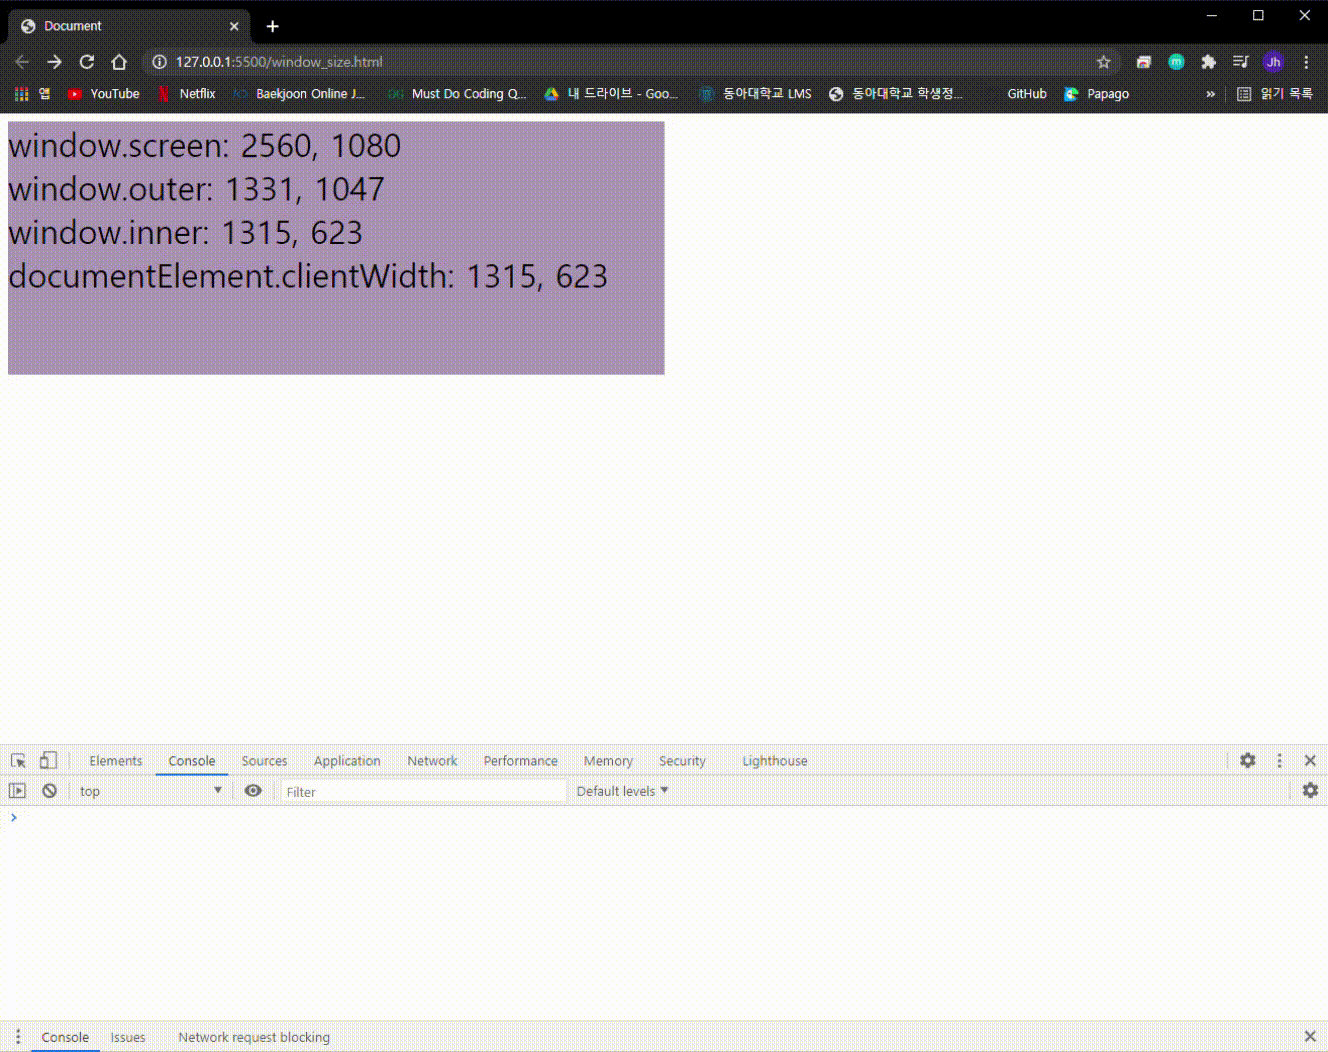
- window 및 document의 여러가지 사이즈 구분하기 실습
<!DOCTYPE html>
<html lang="en">
  <head>
    <meta charset="UTF-8" />
    <meta http-equiv="X-UA-Compatible" content="IE=edge" />
    <meta name="viewport" content="width=device-width, initial-scale=1.0" />
    <title>Document</title>
  </head>
  <body>
    <div
      style="
      background-color: rgb(171, 150, 180);
      width: 650px;
      height: 250px;
      font-size: xx-large;
    "
      class="tag"
    >
      window screen
    </div>
    <script>
      const tag = document.querySelector('.tag');

      function updateTag() {
        tag.innerHTML = `
      window.screen: ${window.screen.width}, ${window.screen.height}<br>
      window.outer: ${window.outerWidth}, ${window.outerHeight}<br>
      window.inner: ${window.innerWidth}, ${window.innerHeight}<br>
      documentElement.clientWidth: ${document.documentElement.clientWidth}, ${document.documentElement.clientHeight}
      `;
      }
      window.addEventListener('resize', updateTag);
      updateTag();
    </script>
  </body>
</html>
- window 크기가 변할 때마다 작동해야하므로 resize 이벤트를 이용하고, innerHTML을 바꿔주는 함수를 따로 선언 및 호출하여 맨 처음 웹을 로드했을 때도 나타나도록 함.
-
Element.getBoundingClientRect() 및 ClientX/Y, PageX/Y에 대해 알고 실습하기

<!DOCTYPE html>
<html lang="en">
  <head>
    <meta charset="UTF-8" />
    <meta http-equiv="X-UA-Compatible" content="IE=edge" />
    <meta name="viewport" content="width=device-width, initial-scale=1.0" />
    <title>Document</title>
    <style>
      body {
        position: relative;
      }

      .btns {
        position: fixed;
        /* fixed 쓰면 top, right, bottom, left로 위치 지정 가능 */
        top: 20px;
        right: 20px;
      }

      .box {
        width: 150px;
        height: 150px;
        background-color: rgb(255, 231, 188);
        margin: 10px;
      }

      .active {
        background-color: orange;
      }
    </style>
  </head>
  <body style="background-color: black">
    <div class="btns">
      <button class="scroll-by" onclick="scrBy()">Scroll by 100px</button>
      <button class="scroll-to" onclick="scrTo()">
        Scroll to 100px(Y)
      </button>
      <button class="scroll-into" onclick="scrInto()">
        Scroll into .active
      </button>
    </div>

    <div class="box"></div>
    <div class="box"></div>
    <div class="box"></div>
    <div class="box"></div>
    <div class="box"></div>
    <div class="box"></div>
    <div class="box active"></div>
    <div class="box"></div>
    <div class="box"></div>
    <div class="box"></div>
    <div class="box"></div>
    <div class="box"></div>
    <div class="box"></div>

    <script>
      const activeBox = document.querySelector('.box.active');
      const boxRect = activeBox.getBoundingClientRect();

      function scrBy() {
        window.scrollBy(0, 100);
      }

      function scrTo() {
        window.scrollTo(0, 100);
      }

      function scrInto() {
        activeBox.scrollIntoView();
      }

      activeBox.addEventListener('click', (event) => {
        console.log(boxRect);
        console.log(`client: ${event.clientX}, ${event.clientY}`);
        console.log(`page: ${event.pageX}, ${event.pageY}`);
      });
    </script>
  </body>
</html>
- 상단 버튼 세개를 누르면 각 기능에 맞게 scroll을 수행함.
- box들 중 색이 다른 한 박스를 클릭하면 해당 박스의 getBoundingClientRect()정보, ClientX/Y, PageX/Y를 콘솔에 출력함.
